4️⃣ Google API Keys
Baltix uses two Google keys:
- A browser key for map display in checkout/thank-you.
- A server key for geocoding (address to coordinates).
The pickup point selector still works without a Google Maps key — customers will see a list view instead of a map. Adding a key enables the map view for a better experience.
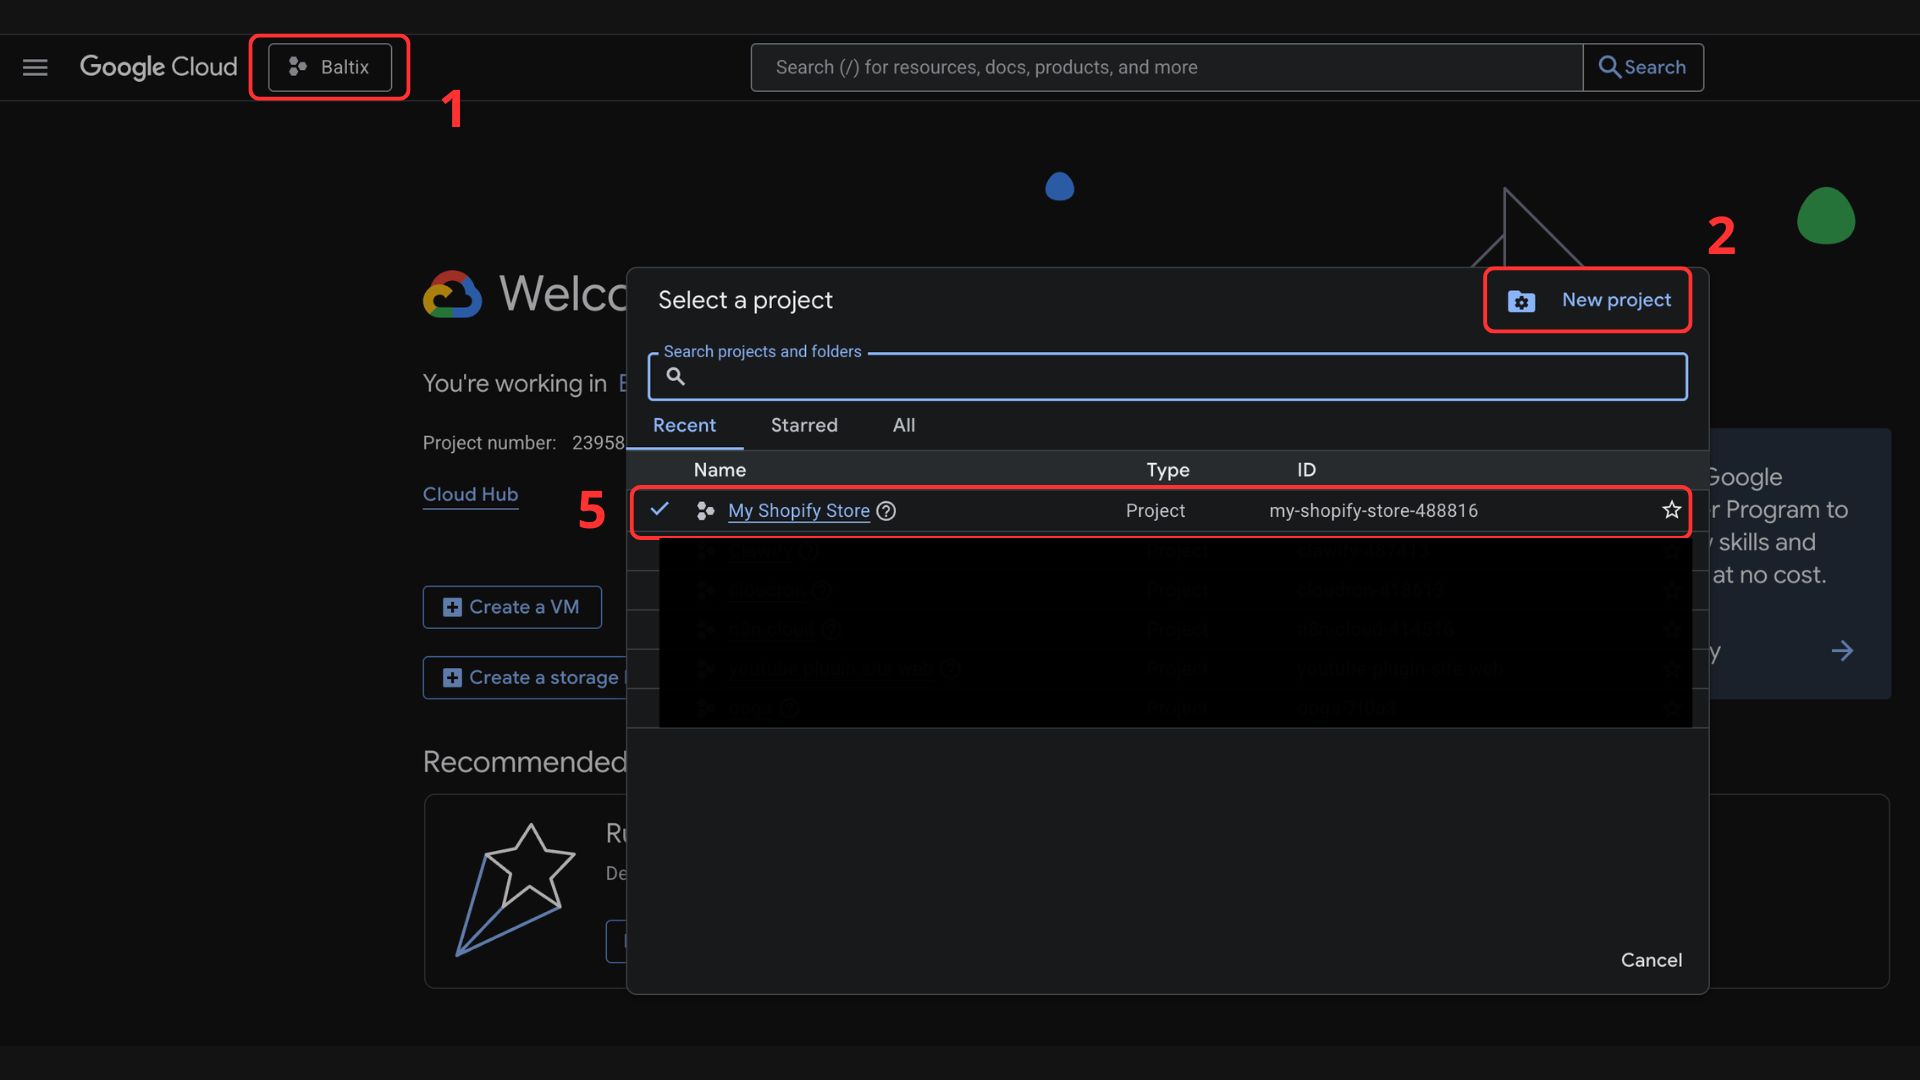
Step 1 — Create a Google Cloud project
-
Go to the Google Cloud Console
-
Sign in with your Google account (or create one)
-
Click Select a project in the top bar (1)
-
Then New Project (2)
-
Give it a name (e.g.
My Shopify Store) (3) and click Create (4)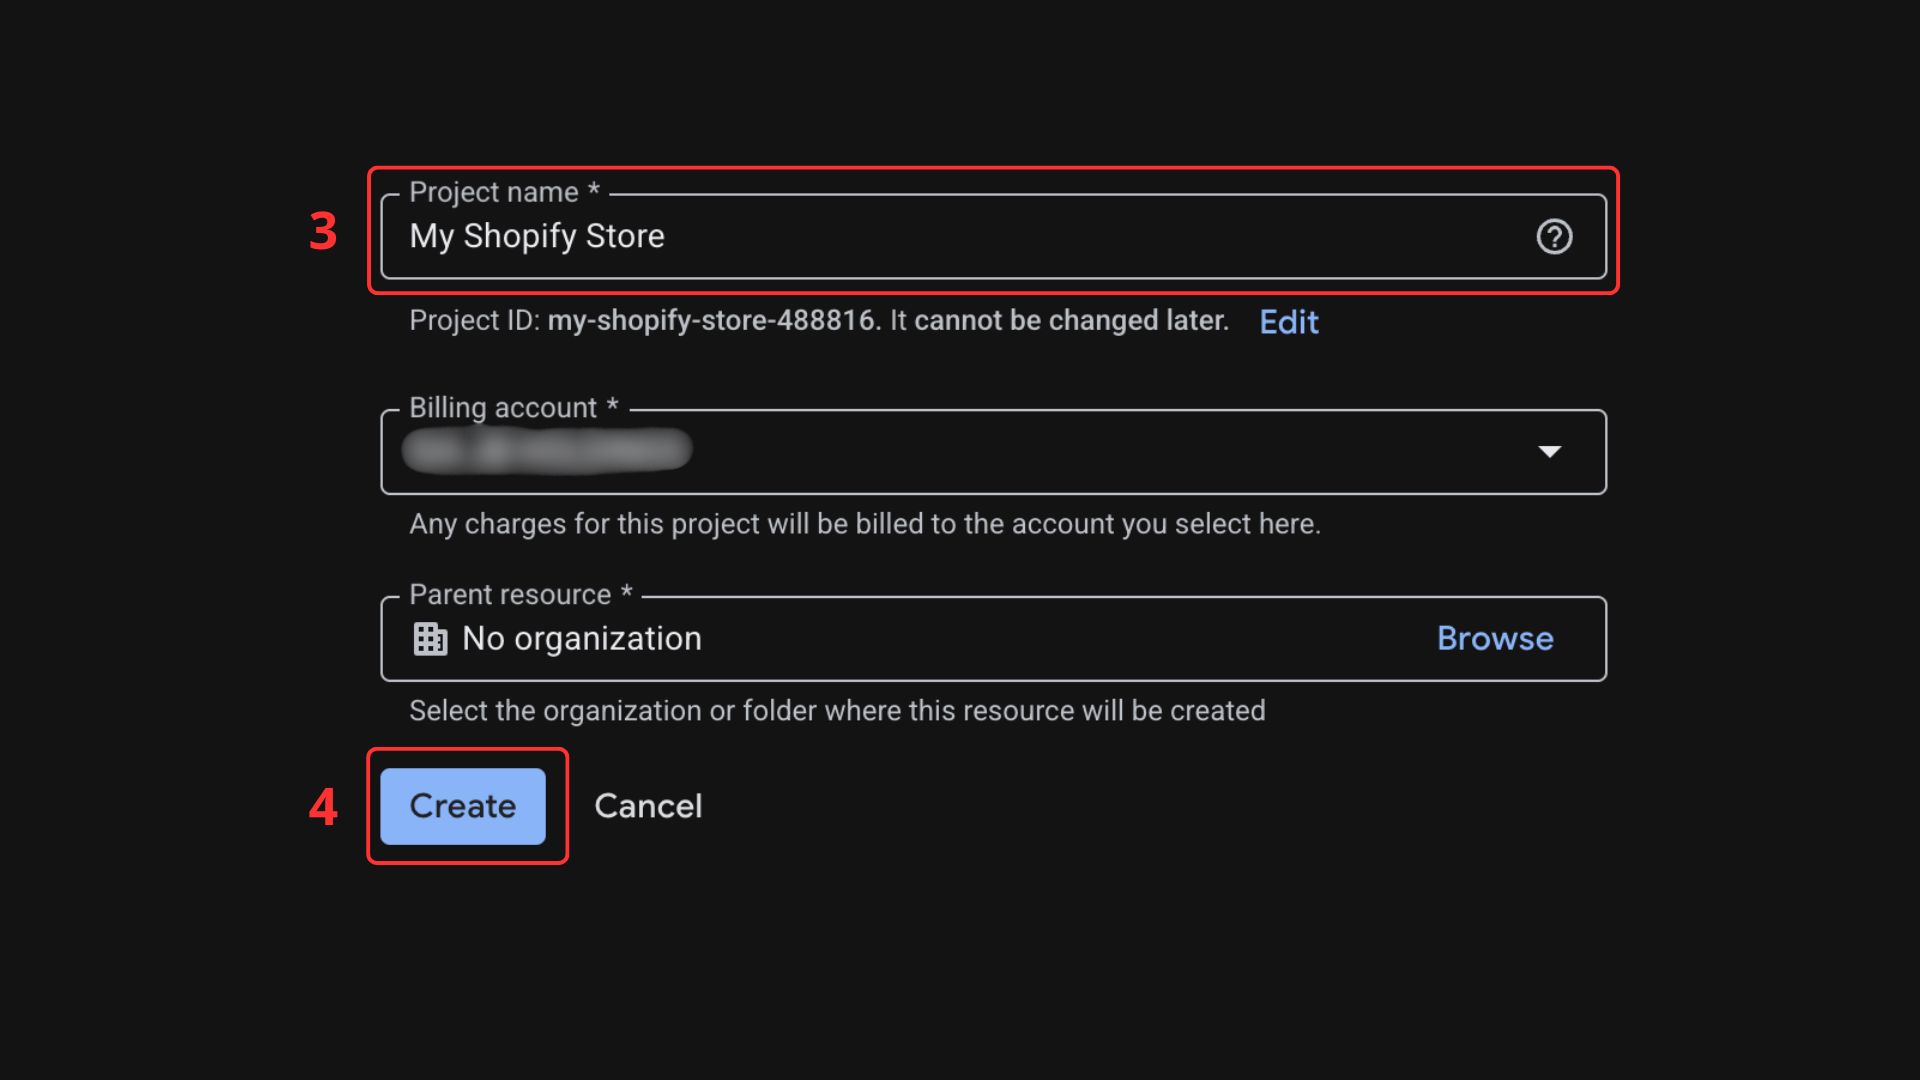
-
Then go to the project by clicking on (1) and then (5)
Google offers a $200/month free credit for Maps API usage. For most stores this means the map is effectively free.
Step 2 — Enable the required APIs
Baltix requires three Google Maps APIs. You must enable all three:
| API | Purpose |
|---|---|
| Maps JavaScript API | Interactive map in the pickup point selector at checkout |
| Geocoding API | Server-side address geocoding for distance sorting |
| Maps Static API | Generates the map image shown in the order confirmation |
For each API, follow the same process:
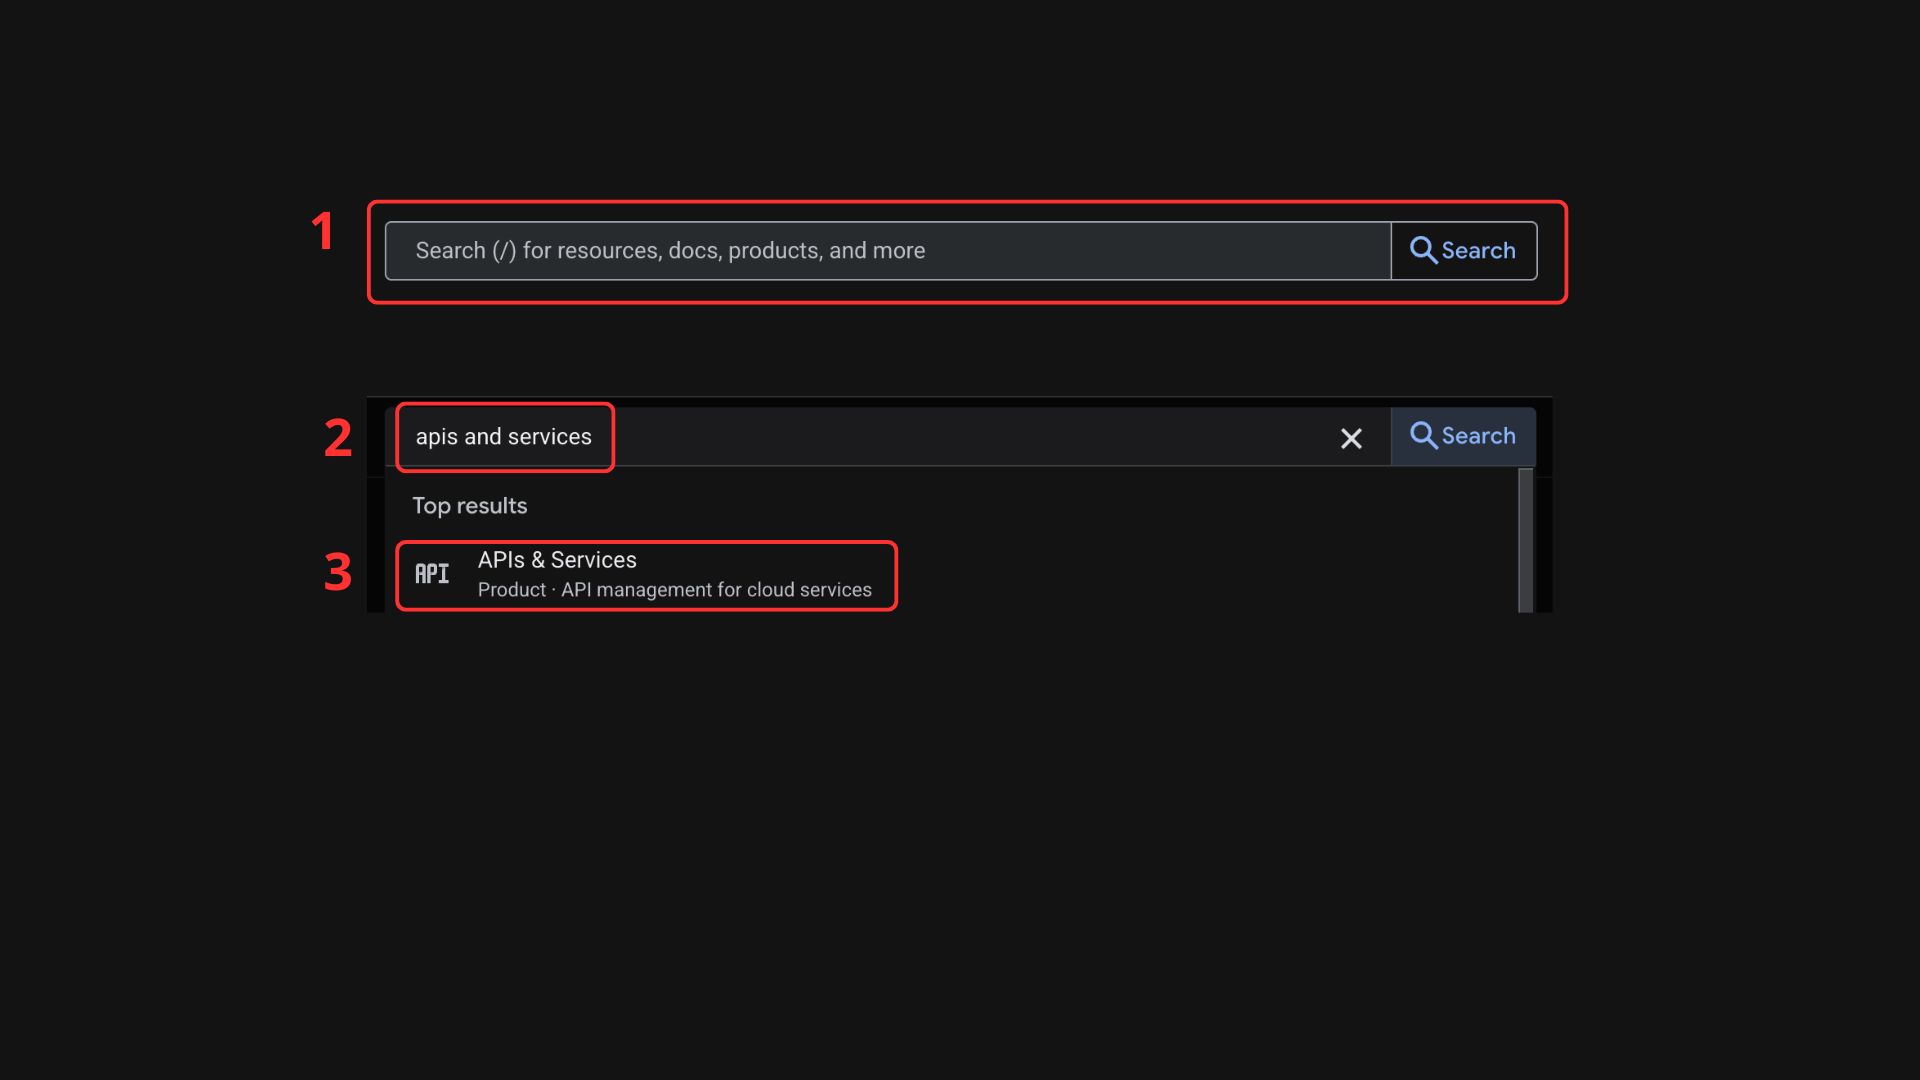
- Search for
apis and services(2) in the bar on the top (1) - Click on APIs & Services
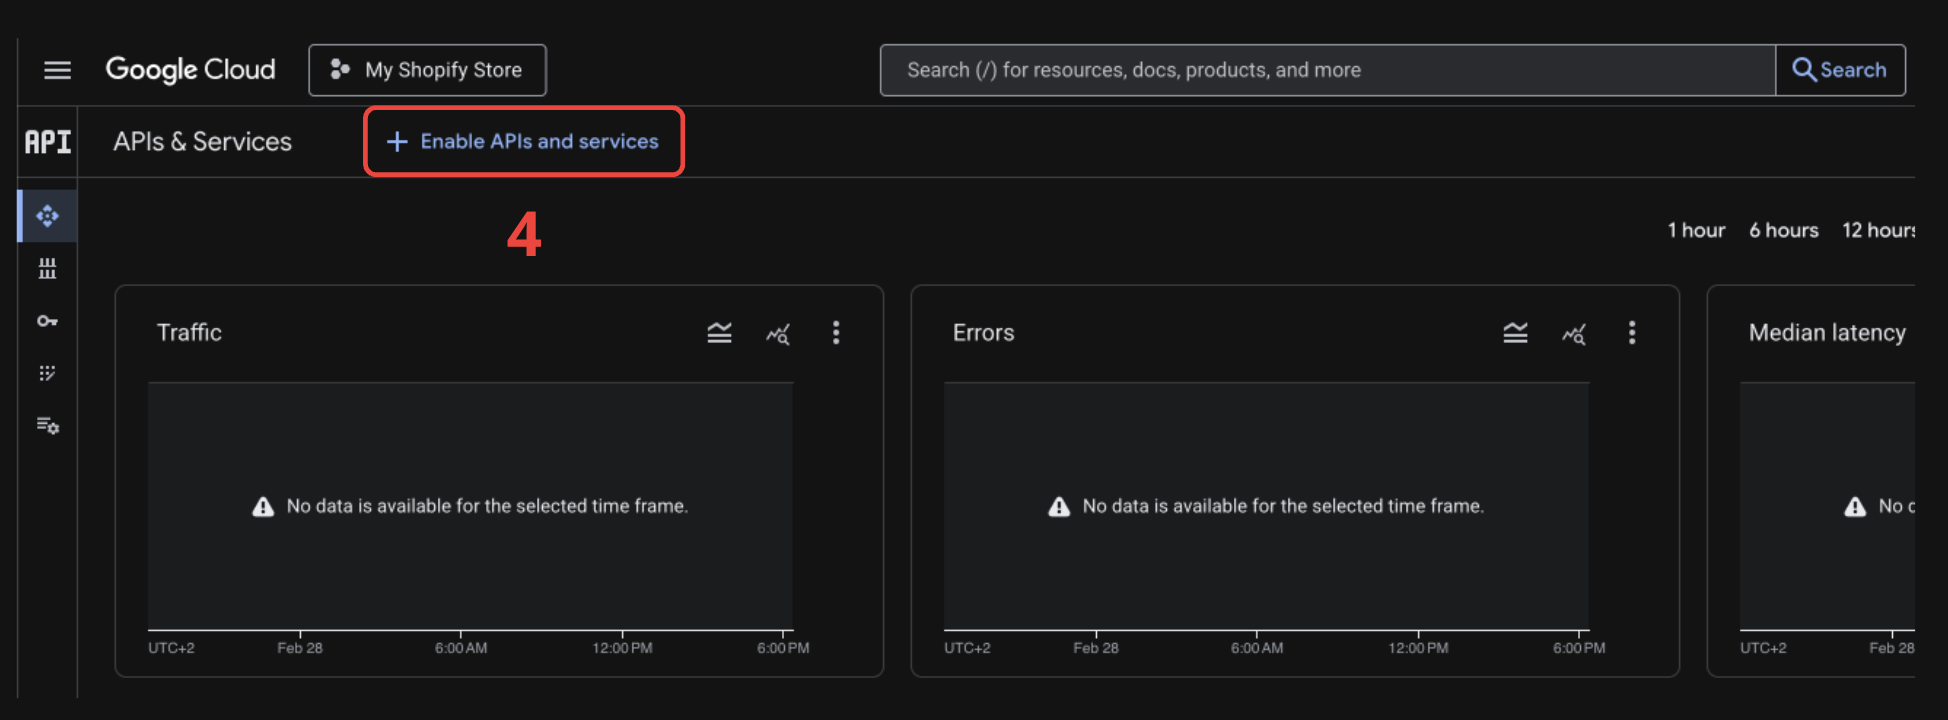
- Then click on + Enable APIs and services
- Search for the API name (e.g. Maps JavaScript API) in the search input
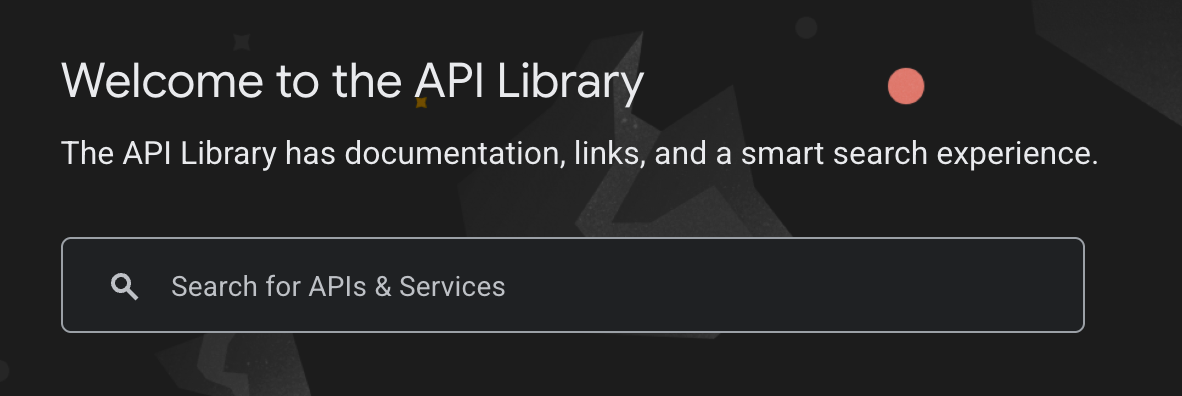
- Click on it

- Then click Enable
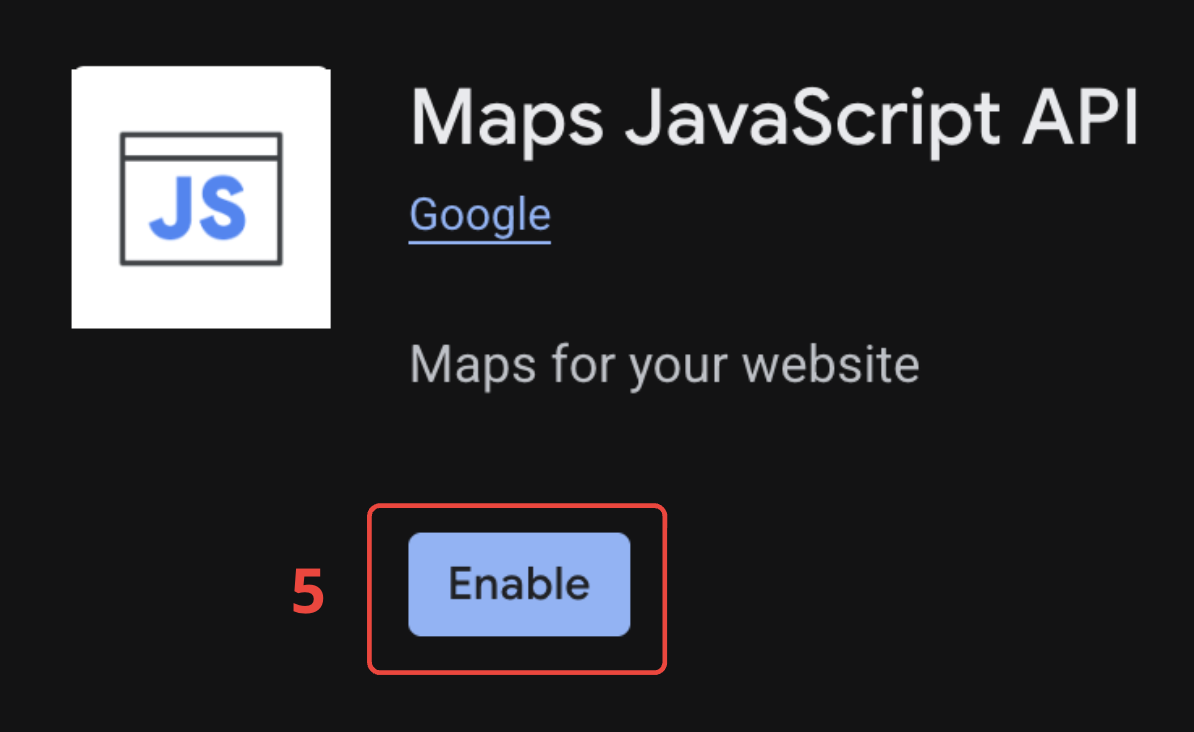
Repeat steps 3–6 for Geocoding API and Maps Static API.
Google requires a billing account to be linked to your project, even if you stay within the free tier. Go to Billing in the console to set it up.
Step 3 — Create the browser key (Maps)
- Go back to APIs & Services
- Click Credentials (1)
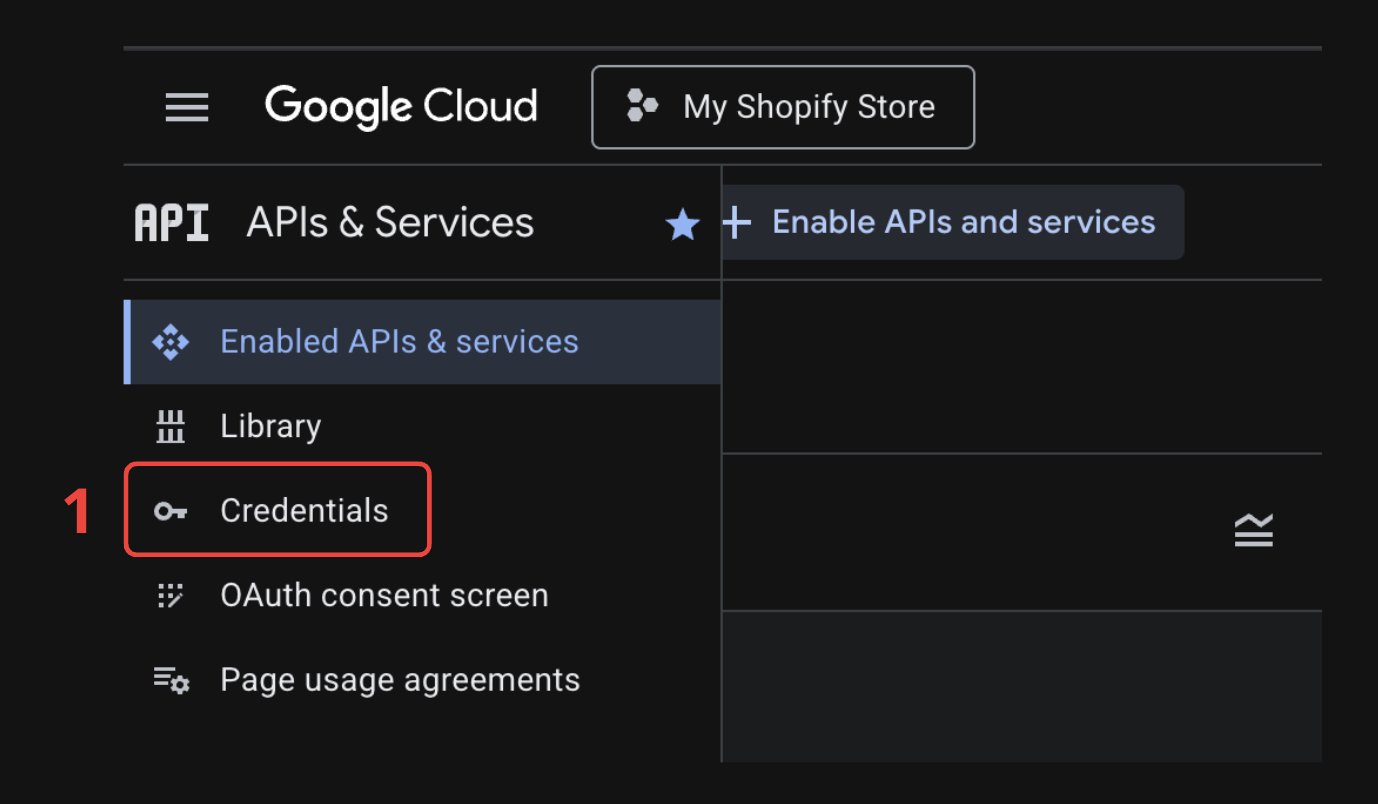
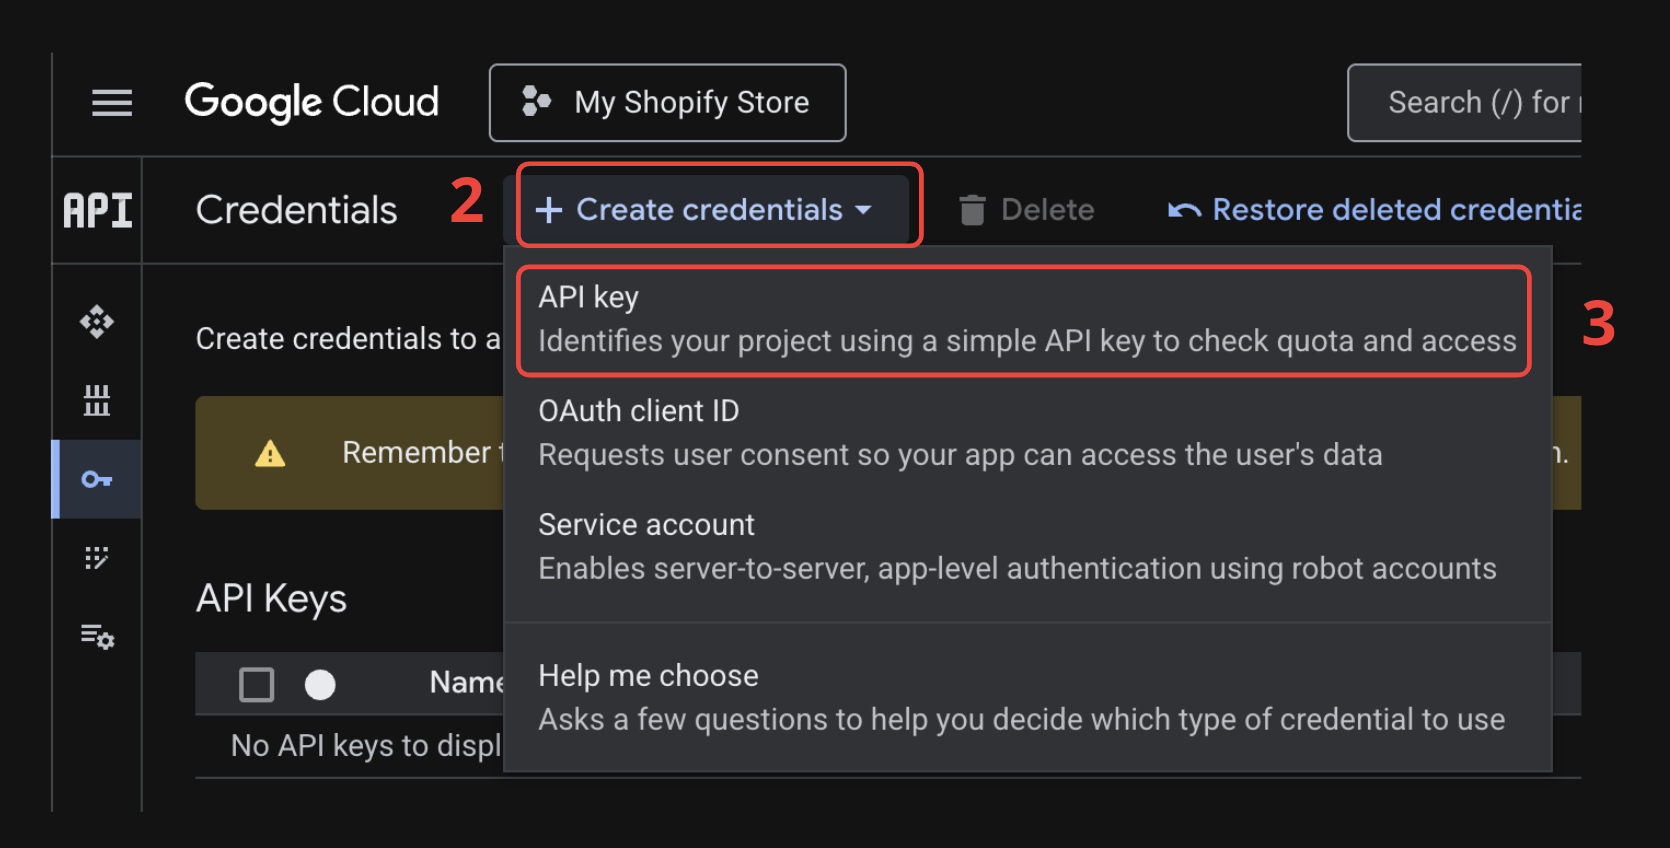
- Then + Create Credentials (2)
- Then API key (3)
- (Optional) Give a name to your key (4)
- Under Application restrictions, select Websites (5)
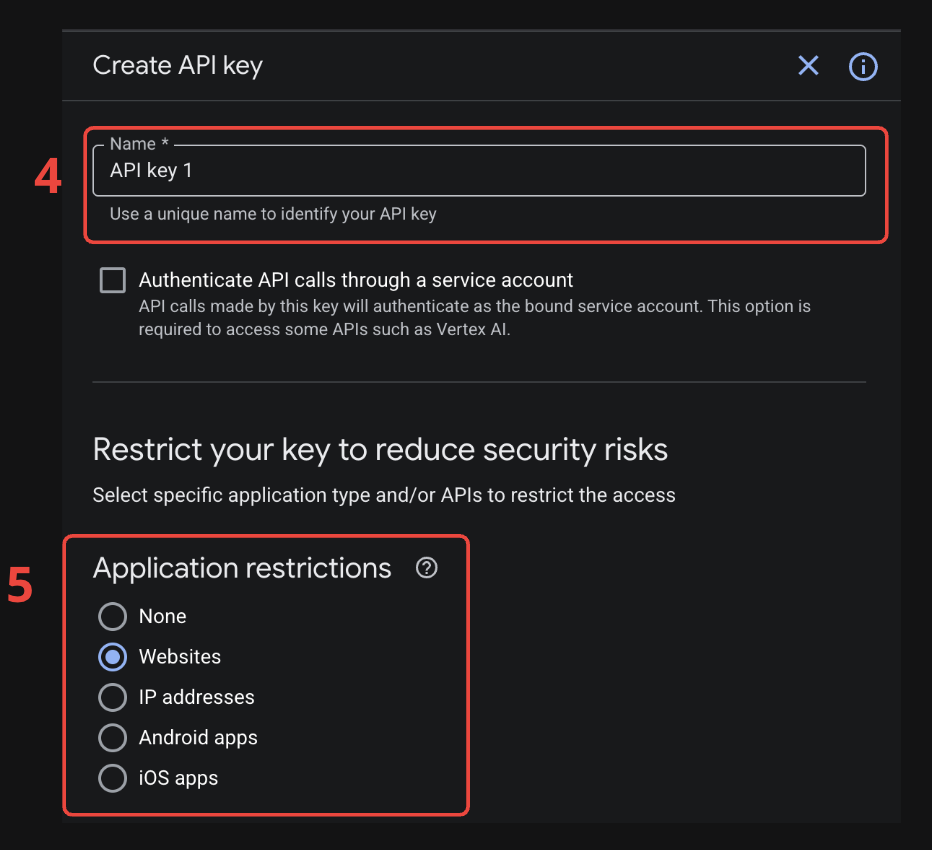
- Add website restrictions.
For security reasons, this protection step is mandatory because the API key will be exposed to all clients. This means that anyone will be able to see the API key. Without those restrictions, anyone copying this key will be able to use it.
To add a new website, click on Add (6). Add your Shopify domain, your custom domain if you have one, and the Baltix app domain.
For example, if your store is baltic-fashion.myshopify.com with a custom domain baltic-fashion.com:
You have to add exactly:
https://baltic-fashion.myshopify.com/*
https://baltic-fashion.com/*
https://*.baltic-fashion.com/*
https://app.baltix-pickup-points.app/*
https://app.baltix-pickup-points.app/* is the same for every store — do not replace it with your own domain. It is required for the map to render inside the Shopify admin. Without it you get RefererNotAllowedMapError.
Do not use only *.baltic-fashion.myshopify.com/*.
This does not match the root domain baltic-fashion.myshopify.com/* and causes RefererNotAllowedMapError.
Replace the example URLs above with your own store domains.
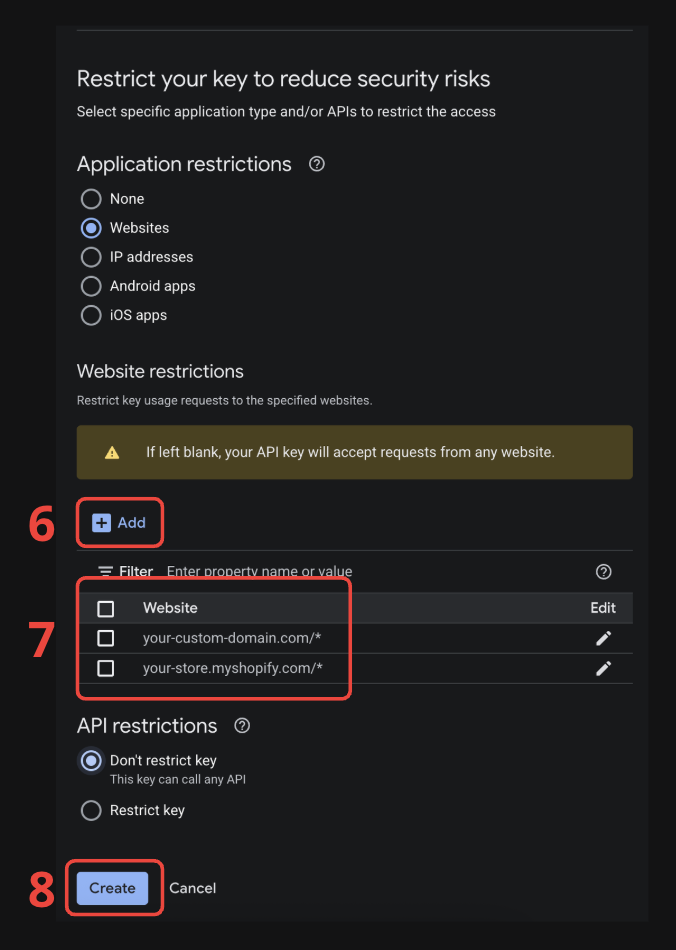
- Click Save (8)
Then set API restrictions for this key to:
- Maps JavaScript API
- Maps Static API
Step 4 — Create the server geocoding key
Create a second key in APIs & Services > Credentials:
- Click + Create Credentials > API key
- Set Application restrictions to
None - Set API restrictions to Geocoding API only
Do not use HTTP referrer restrictions for this server key.
Step 5 — Set daily quotas (optional)
To prevent unexpected charges, you can set a daily request limit:
- Go to APIs & Services > Maps JavaScript API
- Click the Quotas tab
- Set a daily limit (e.g. 1,000 requests/day is plenty for most stores)
Step 6 — Add keys in Baltix
- Open the Baltix app in your Shopify admin
- Go to Settings > General
- Paste your browser key in Google Maps API Key
- Paste your server key in Geocoding API Key (Server)
- Click Save
Verify it works
- Go to your store and add a product to the cart
- Proceed to checkout and select a shipping method linked to a carrier
- The pickup point selector should display with a map view
If you see the list view but no map, check the troubleshooting section below.
Troubleshooting
| Problem | Solution |
|---|---|
| Map doesn't appear | Make sure all three APIs are enabled (Step 2) |
| Map shows but pickup points are not centered correctly | Make sure the Geocoding API is enabled and the Geocoding API Key (Server) is filled in Baltix |
| No map image in order confirmation | Make sure the Maps Static API is enabled |
| "ApiNotActivatedMapError" in browser console | Enable billing on your Google Cloud project |
| "RefererNotAllowedMapError" | Check your HTTP referrer restrictions. Add the exact root domain (your-store.myshopify.com/*) and not only *.your-store.myshopify.com/* |
| Map loads but shows "For development purposes only" | Link a billing account to your Google Cloud project |
| Key saved but map still not showing | Wait a few minutes — Google can take up to 5 minutes to propagate a new key |